
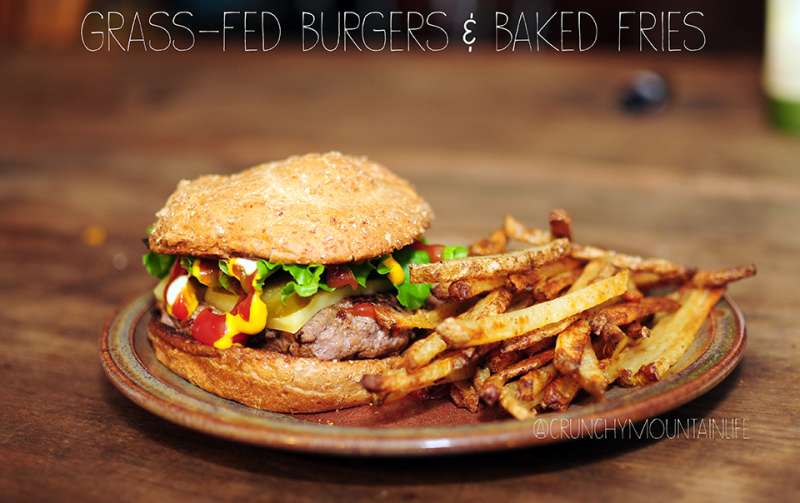
Who’s ready for a YUMMY burger and fries recipe?!
I truly believe that burgers taste best, and retain more juiciness, when cooked on the stovetop. My husband agrees, thankfully, which makes it super easy and convenient to have delicious “summertime” food, year-round! (because let’s face it…we’d look pretty foolish firing up the grill on these snowy, sub-zero temperature mountain days)
Burger FYI: The spices in this burger came from 100 Days of Real Food (minus the onion…I do not put the onion in my burgers…the preparation and execution of these bad boys was ALLLLLLLL me.
Fries FYI: This recipe came straight from the gals over at Layer of Happiness. I found this EASY and healthy recipe through Pinterest and I am SO glad I did! I didn’t use all the spices they referenced on their blog, so I’ll just tell you what I did to make these.
Grass-Fed Burgers Recipe
What you’ll need:
– 1 tablespoon soy sauce
– 1 teaspoon mustard powder
– 1/2 teaspoon garlic powder
– 1/4 teaspoon ground black pepper
– 1/2 cup diced onion (optional – can use onion powder if preferred…I prefer no onion at all)
– 1/4 cup grated white cheddar cheese, plus extra sliced to top the burgers
– 1 pound ground grass-fed beef
– 4 good quality whole-wheat hamburger buns – or make your own here (super easy and delicious!)
What to do:
Step 1: Keep your meat cold until ready to cook – when you shape your patties, don’t pack them down…instead gently form 4 round patties – loosely packed. Then refrigerate until ready to hit the stove.
Step 2: Heat up a large cast iron skillet over medium heat. Add a few good dollops of butter. Once skillet is nice and hot, take your patties out of the fridge and gently set into the pan.
Step 3: Let them cook on one side for approximately 5 minutes (DO NOT FLIP THEM OVER while they cook on this side)…A stovetop burger should only be flipped once, for maximum juiciness.
Step 4: Gently flip burgers over, and cook for an additional 5 minutes on the second side. You shouldn’t have to, but if you’re curious and just want to know for sure if they are cooked inside, you can make a small slice in the middle with a knife to check it out. If it’s not quite done, do NOT flip it again. Let it go for an extra minute or two.
Step 5: Remove burgers and place buns inside skillet to gently brown them (this is of course, optional…but it just tastes so good!)
Step 6: Garnish with whatever you like and enjoy!
Baked French Fries Recipe
What you’ll need:
– 1 – 4 medium russet potatoes (depending on the amount of people you are cooking for)
– Extra Virgin olive oil
– Salt
– Ground Black Pepper
– Seasoning salt (optional)
– baking sheet (or 2)
– parchment paper
What to do:
Step 1: Preheat oven to 400 degrees
Step 2: Slice the potatoes into thin slices (I like about 1/4 inch) and let soak in cold water for about 30 minutes.
Step 3: Lay potatoes onto a paper towel or clean dish towel and pat dry.
Step 4: Place potato slices in a medium – large bowl (with lid if you can…it just makes coating them easier). Add a few drizzles of Olive Oil, add salt and pepper to taste and seasoning salt, if desired.
Step 5: Place lid on bowl and shake well. If no lid, stir with rubber spatula until well coated.
Step 6: Cover baking sheets with parchment paper and lay coated potatoes in a single layer (do not overlap).
Step 7: Bake for 30 minutes, flipping over once or twice with a spatula, at the 15 minute mark.
Step 8: Remove fries from over, and crank up the heat to 425 degrees. Return fries back to oven and cook for an additional 20 minutes, or until the ends of the smaller fries start to look burnt.
Step 9: Remove, serve immediately, and enjoy!
(I added an extra little sprinkle of salt once they were done and they turned out PERFECT!)

I’m so excited to be doing this recipe again tonight, but with homemade hamburger buns!! Whaaaaaatttt??!!