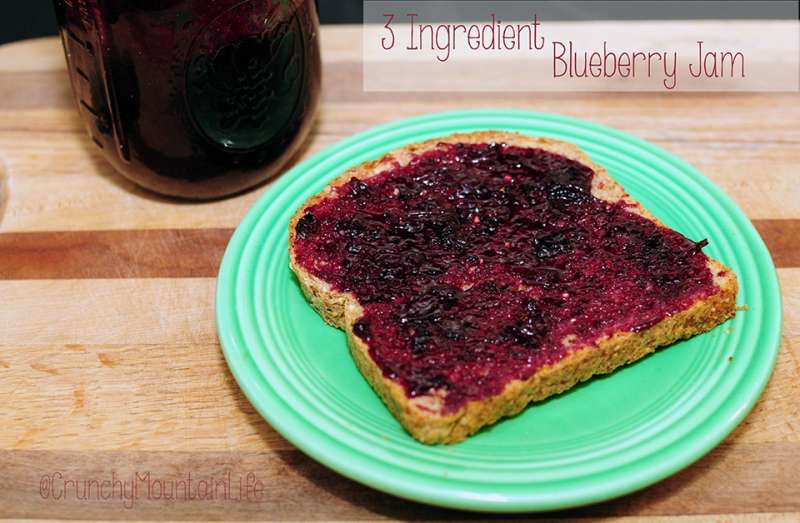
*UPDATE* The original post was for blueberry jam, and although it was awesome, it wasn’t a favorite with my kiddos. So I did the exact same recipe, except with strawberries, and it’s been a HIT! You’ll just increase your cook time by about 2 minutes…but other than that, it’s the same!
Oh yes, I did.
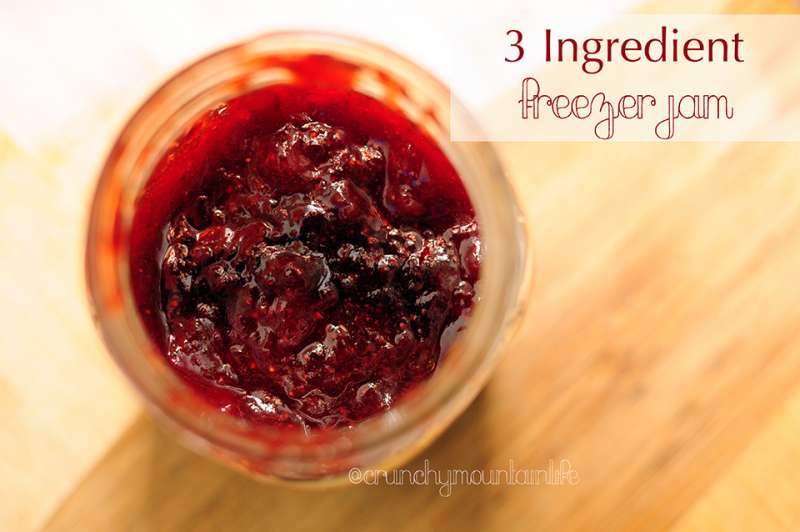
Today I did it. The thing that has, for months, intimidated me. I made (and quite successfully, I might add) homemade jam! and not just any jam. No. Jam without added pectin, without refined sugar, where the ingredients are THREE simple, and real ingredients. Strawberries (or really any jammy fruit you want to try). Honey. Lemon juice. Done.
I always thought I couldn’t make my own jam, so I had to buy it. I thought I was buying good brands with very little ingredients. But the closer I looked at the ingredient labels, and the more research I did on the various companies and how they processed their preserves, I was disgusted. Sugar was always the first or second ingredient. ALL of them had added pectin, and most had a myriad of other “things” in it that I just did NOT want to feed my family. So out of desperation, I decided to give this a go. Lisa from 100 Days of Real Food has never steered me wrong before. Why would she now? And she didn’t. This recipe does NOT disappoint. Plus, it only took about 15 minutes total!
I also love how versatile this recipe is…you can do this with pretty much any fruit (fresh or frozen)! Cook times may vary, but the basic approach is still the same. So before I ramble you into a coma, I present to you…
3 Ingredient Freezer Jam
What you need:
- 1.5 pounds of fresh (or frozen) berries
- 2/3 cups raw honey
- juice from half a lemon
Directions:
Step 1: Wash the berries well (if using frozen, defrost completely) and place in a low, wide pan (I used a high sided skillet). Using a potato masher, mash up the berries (this can also be a fun activity for your kids to help you with, too!)
Step 2: Add the honey and lemon juice and stir to combine.
Step 3: Place the pan on the stove and bring to a boil. Cook, stirring regularly – about 10-12 minutes, until the jam thickens. You’ll know it’s done when you can draw a line in the pan with your spatula and the space stays open for a moment.
Step 4: Funnel into jars and allow to cool completely before placing in the fridge.
**This jam can be stored in the fridge for 2-3 weeks (but let’s be honest…it won’t last that long in this house). You can also freeze it for later! I put half in a clean canning jar for immediate use, in the fridge, and the other half in another clean canning jar in the freezer. Just be sure, if using glass, to put it in a jar with straight sides, to allow for expansion.
So that’s it! It literally took me a total of 15 minutes from start to finish (minus the cooling time, of course). 😉
And yes…it tastes as good as it looks!! Enjoy!
(here is an image of the blueberry version)